The Ultimate Guide to Stormboard's Sticky Notes
Stormboard’s sticky notes are powerful tools that enable you and your team to work more effectively and efficiently. In this post, we will teach you everything you need to know to use our sticky notes like a pro.
What you will learn in this article:
What are Stormboard sticky notes?
How to create a sticky note
Types of sticky notes
Moving sticky notes around your Storm
Changing the color of a sticky note
Changing the shape of a sticky note
Changing the size of a sticky note
Editing and deleting a sticky note
Commenting on a sticky note
Using the Rapid Fire function
Duplicating a sticky note
Locking a sticky note
Copying or moving a sticky note to another Storm
Viewing the sticky note history
Voting on sticky notes
Assigning a task to a sticky note
Connecting sticky notes
What are Stormboard sticky notes?
Stormboard’s sticky notes are digital versions of the real thing! They come in different colors, shapes, and sizes that you can customize to suit the way you work.
All the content you add to a Storm (what we call your Stormboard digital workspace) uses a digital sticky note. There are eight different types of sticky notes — text, whiteboard, image, video, index card, file, embed, and StormAI sticky notes.
How to create a sticky note
Once you are in a Storm — if you are working on a desktop, laptop, or tablet — double click anywhere on your screen to create a new sticky note. You can also click the “Add Sticky” button in the bottom toolbar.
If you’re working on a Microsoft Surface Hub, tap the screen once with the Surface Hub Pen to create a new note. A note can be added on our mobile app using the plus sign button on the bottom toolbar.
When a new sticky note opens, it is automatically set to text mode so you can start adding your content immediately. You can change to a different mode using the sticky note menu that appears at the top of the note.
Types of sticky notes
There are seven different types of sticky notes for you to choose from.
1. Text Sticky Notes
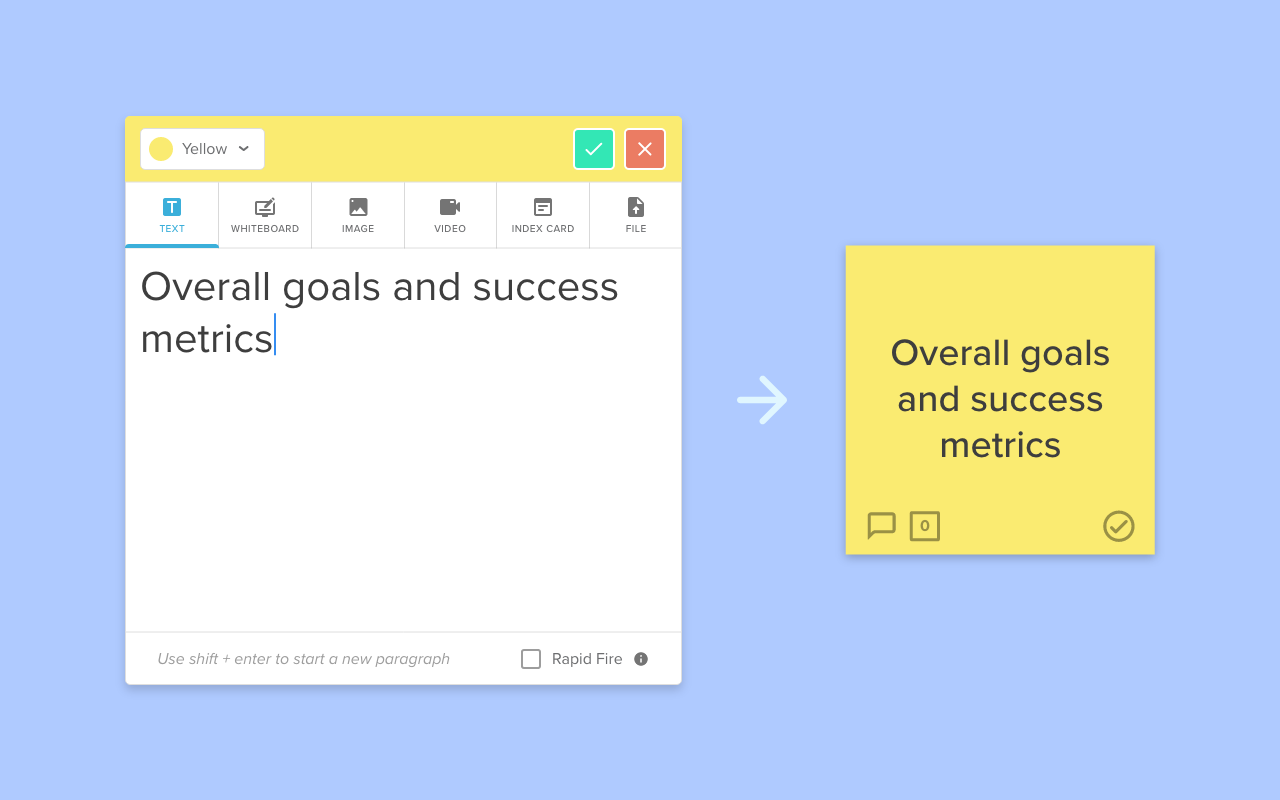
This sticky note type is the most basic form and default setting whenever you open a new note. You can write or paste any text in your Storm on this note.
You can customize the font size, style, and alignment by clicking on the “Setup” button at the bottom of your screen and selecting the “Styling” tab. Here's an example of a text sticky note:
2. Whiteboard Sticky Notes
To change your sticky note to the whiteboard mode, select “Whiteboard” from the sticky note menu and click “Start a new Whiteboard.”
Your sticky note will now become a whiteboard where you and your team can draw and create (at the same time!) with various colors and tools. You can also add text, images, shapes, make connections between ideas, and more!
3. Image Sticky Notes
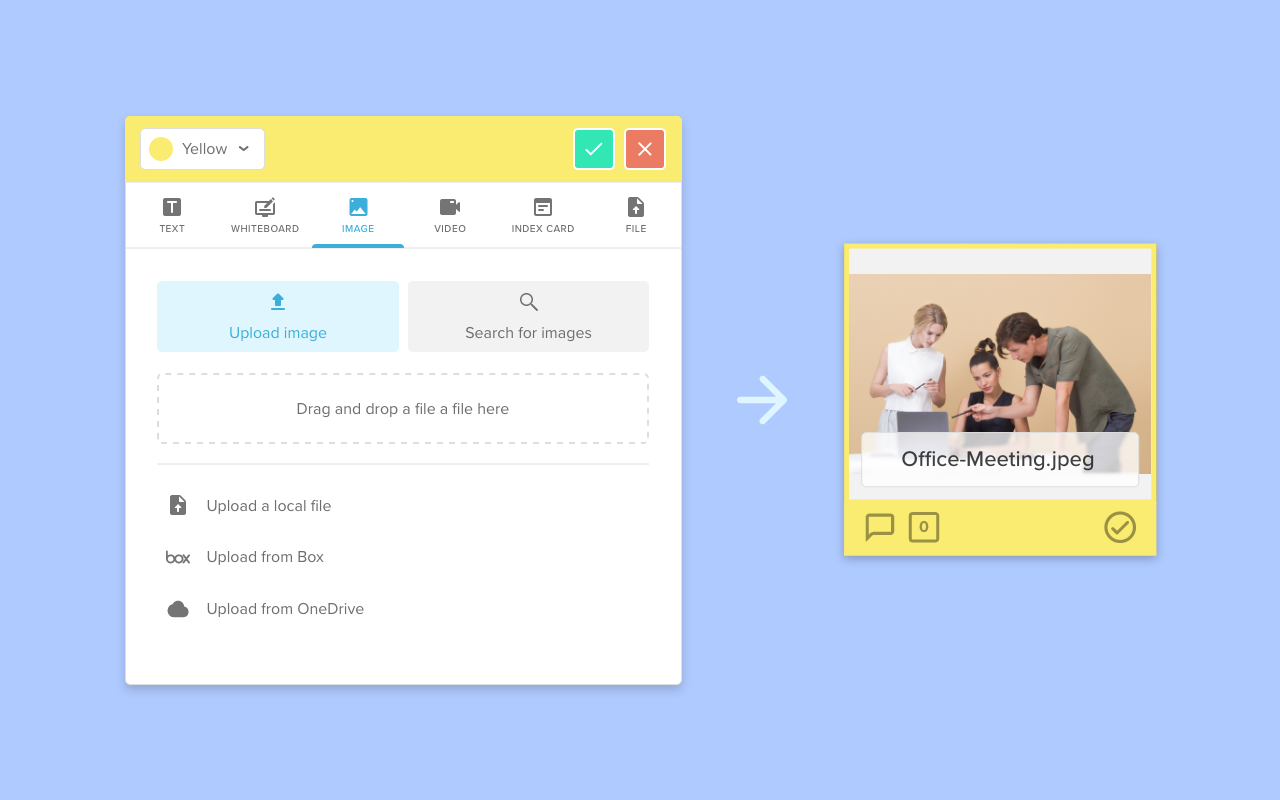
To change your sticky note to image mode, select 'Image' from the top of the note. You can drop an image from your computer onto the image sticky note or choose 'Upload image' to upload an image from one of the three options:
You also have the option to search for royalty-free images on Pexels or Unsplash. Click 'Search for images' to access these options.
The imported image is then saved in the Storm and accessible by anyone on your team.
4. Video Sticky Notes
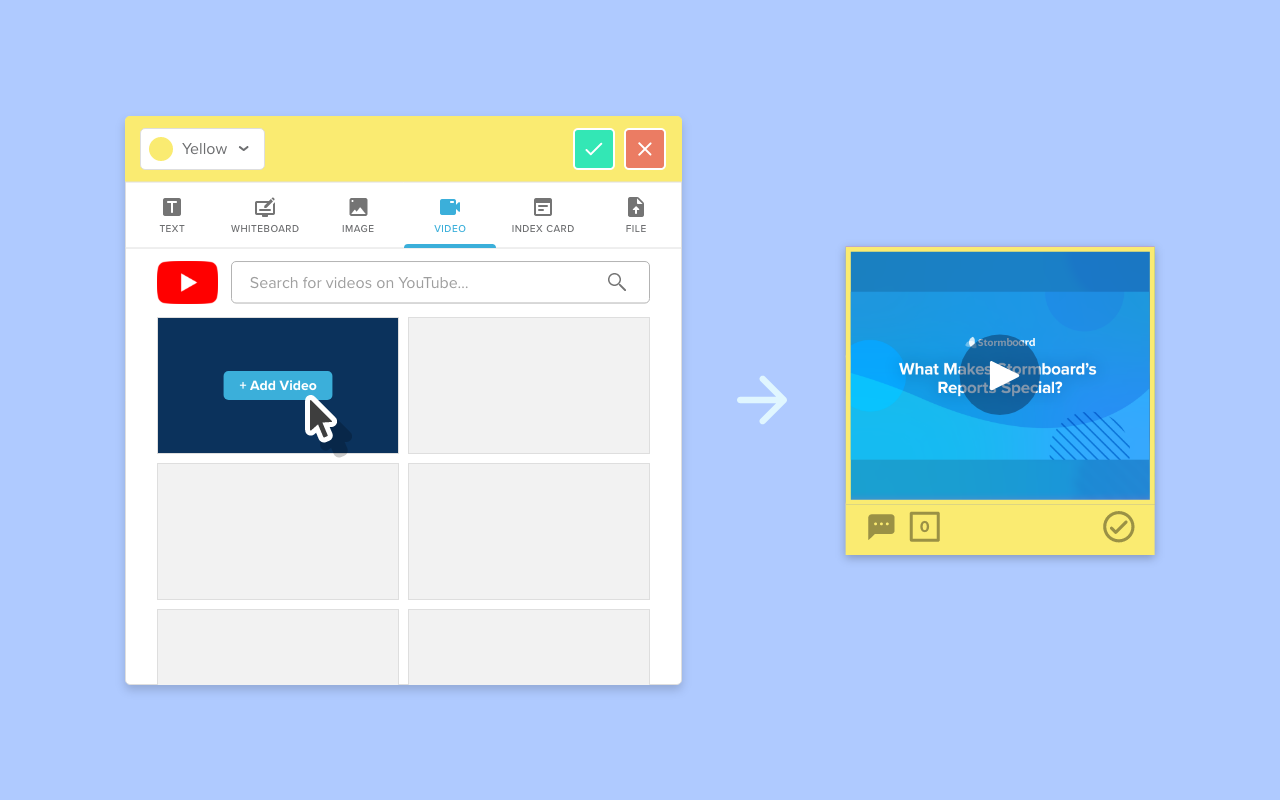
To change your sticky note to video mode, select “Video” from the menu at the top of the note. A YouTube search bar will appear where you can search for a specific video using keywords, the title, or a URL.
Once you have added the video, click the checkmark at the top of the note or hit enter to save it to your Storm. Your team can view the video by double-clicking on the note or by clicking “Play Video.”
5. Index Cards
To change your sticky note into an Index Card, select “Index Card” from the menu at the top of the note. Our digital index cards resemble physical index cards, allowing you to write and group notes.
When you open a new index card sticky note, there will be a red line at the top of the card. It is above the red line where you write the title of your index card. To fill in the rest of the card, you must hit enter to save it.
Then, click the ‘plus sign’ under the card's title to add content, or drag other sticky notes onto the index card to add them.
6. File Sticky Notes
To change your sticky note to file mode, select “File” from the menu at the top of the note. There are numerous ways to add files (shown below).
You can drag and drop a file, upload files from your computer, Box, Dropbox, or OneDrive, or create new Microsoft files (or Google files) while in your Storm. These files can be live co-edited with your team members and automatically saved to your Storm.
7. Embed Sticky Notes
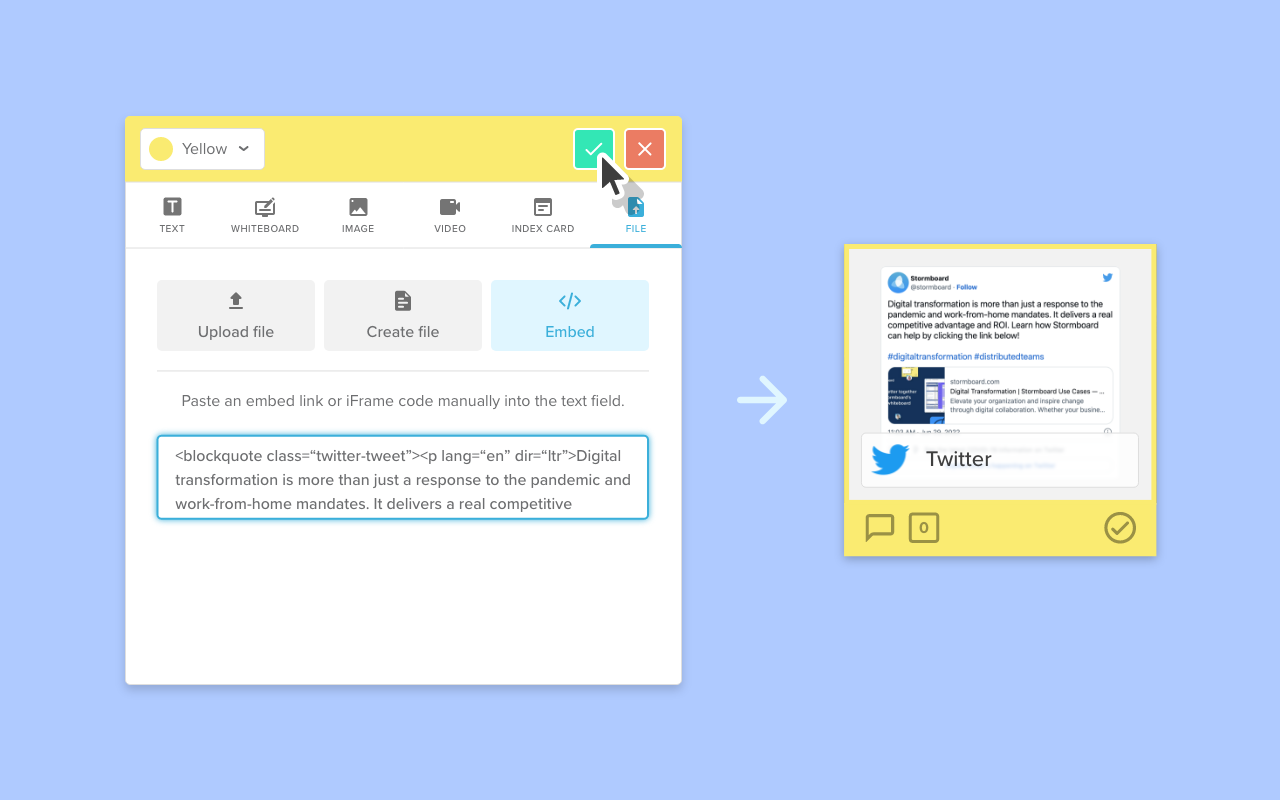
Similar to how you create file sticky notes, you can find the ‘Embed’ option under the ‘File’ tab. Embed sticky notes allow you to embed your favorite apps directly inside your Storm.
To embed an app, copy the embed link (or iFrame code) from your app and paste it into the text field shown below. Click the green checkmark to add your embedded app to your Storm.
You can access your embed by clicking once on the sticky and clicking the ‘Open Embed’ button. This will open a sidebar in Storm where you can view and interact with your embedded app.
8. A.I.-Generated Sticky Notes
StormAI is an augmented intelligence (A.I.) co-collaborator. It works alongside humans to brainstorm ideas, plan, and problem-solve. Its unique architecture assesses all your Storm content before adding more relevant ideas.
To use StormAI sticky notes, click the lightbulb icon in the top right-hand corner of the Storm section. Sticky notes will appear with a bulb icon in the top left corner. From there, you can move, delete, and edit notes as needed.
Moving sticky notes around your Storm
To move a sticky note to a different area of your Storm, simply drag and drop it! It will stay where you place it until you move it again. Use the blue guidelines to align your notes, or use the magnetic section type to keep everything tidy.
Changing the color of a sticky note
When you open a new note or re-open one, the top bar of the note will have circular color options for you to choose from. Click on the color you want, and the color of the note will change. You can also change the color from the sticky note menu. Click once on the note to open the menu.
If you don’t see the color you are looking for at the top of your note, click on the “Settings” button at the bottom of your Storm and then the “Styling” tab.
From there, use the drop-down menu next to “Legend” to change the set of colors you can access for your sticky notes. Hit “Save Changes” after choosing the color set you prefer.
Changing the shape of a sticky note
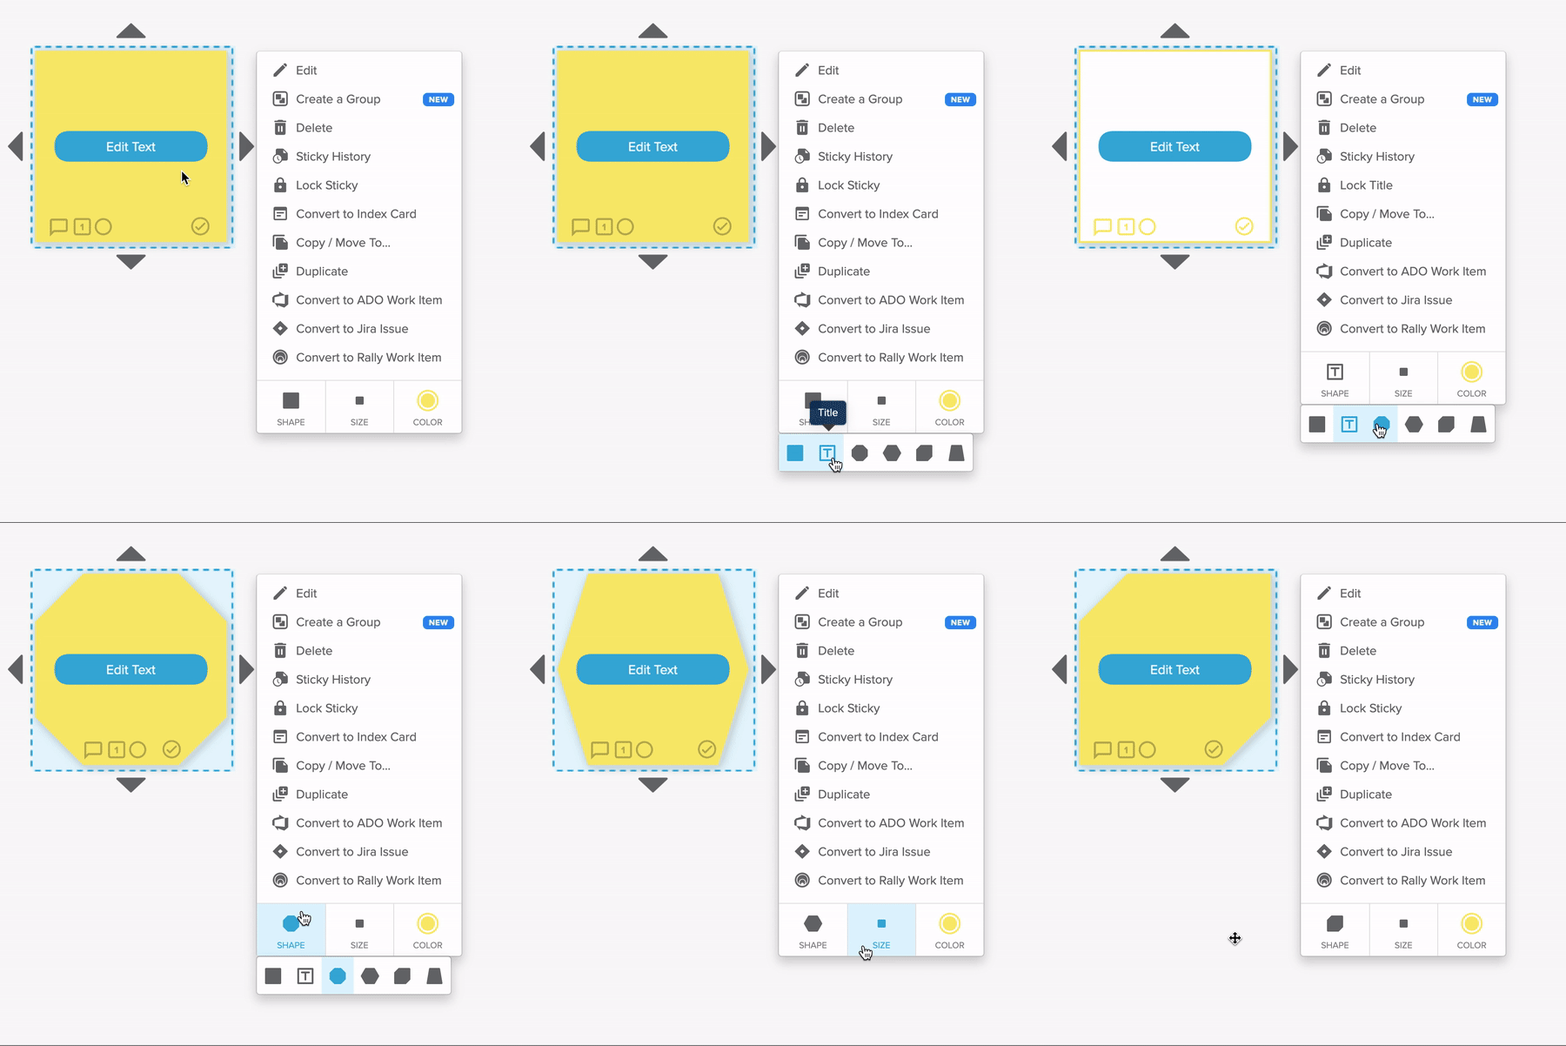
Click once on any sticky note to open the sticky note menu. Here you can select the shape you would like your note to be.
The shapes offered are square, title (which you can use as a header sticky), octagon, hexagon, gem, and triangle — yes, we call this a triangle, even though it has four sides!
Changing the size of a sticky note
Click once on any sticky note to open the sticky note menu. You can then change the size of the note to be 1×2, 2×2, or freeform. Drag freeform notes out and resize them to whatever size you like.
Editing and deleting a sticky note
There are two main ways to edit a sticky note.
Double-click on a note to open it. Edit the note. Click the green checkmark or hit enter to save your changes.
Click once on a note and select “Edit” from the sticky note menu. Edit the note. Click the checkmark or hit enter to save.
Remember, you can only edit a sticky note that you created. You can’t edit other users’ notes, but you can comment on them (see the next section).
To delete a sticky note, click on it once, choose “Delete” from the sticky note menu, or press the delete key on your keyboard.
Commenting on a sticky note
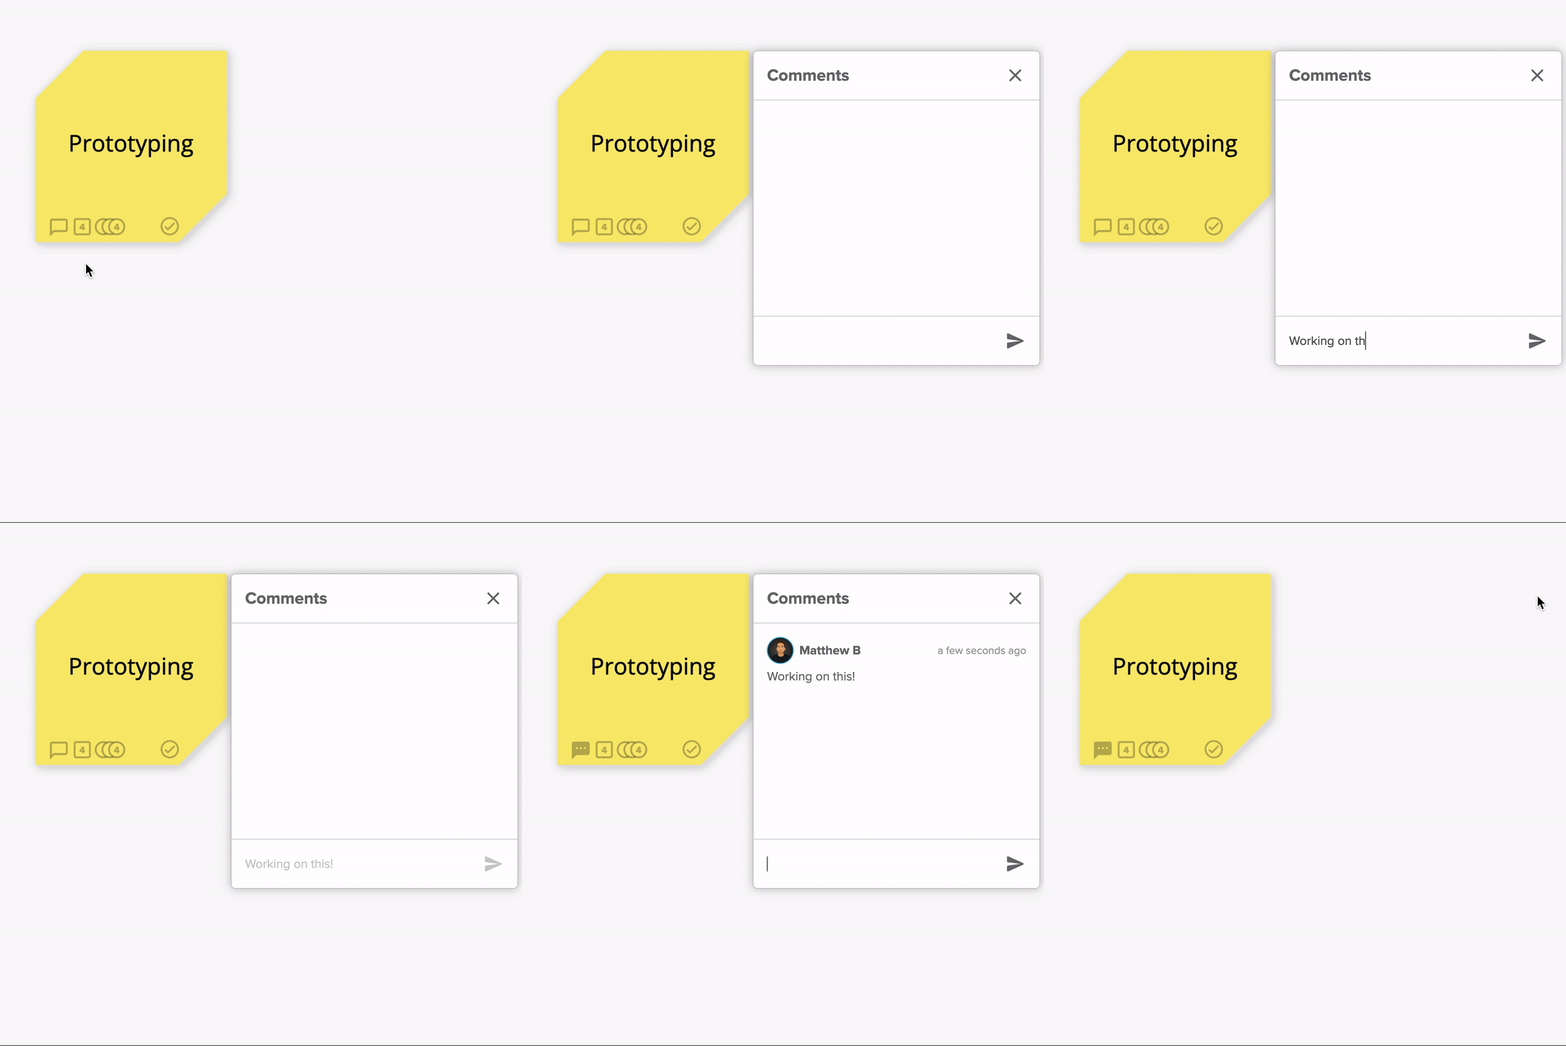
Every sticky note has its own comment thread. Everyone in a Storm can comment on any note, and there is no limit on the number of comments per note. Commenting is a great way to discuss ideas or elaborate on them.
Using the Rapid Fire function
If you need to add ideas quickly, try the Rapid Fire feature. When you open a new sticky note, you will see the phrase “Rapid Fire” at the bottom right with a checkbox next to it. When enabled, this feature creates new sticky notes one after another, so you don’t have to keep double-clicking to open a new note each time.
To enable this function, click on the checkbox next to Rapid Fire. This is a great way to quickly get content into your Storm.
Duplicating a sticky note
Click once on any sticky note and select “Duplicate” from the sticky note menu. When you click on this option, an exact duplicate of that note will appear for you to move to where you need it.
Locking a sticky note
To lock a sticky note, click once on the note so the sticky note menu appears.
Click “Lock Sticky”, and the sticky note becomes locked in place with a red pin. No one else in your Storm will be able to open or move the note. Only the person who locked the note can unlock it so that it can be edited or moved again.
Copy or move a sticky note to another Storm
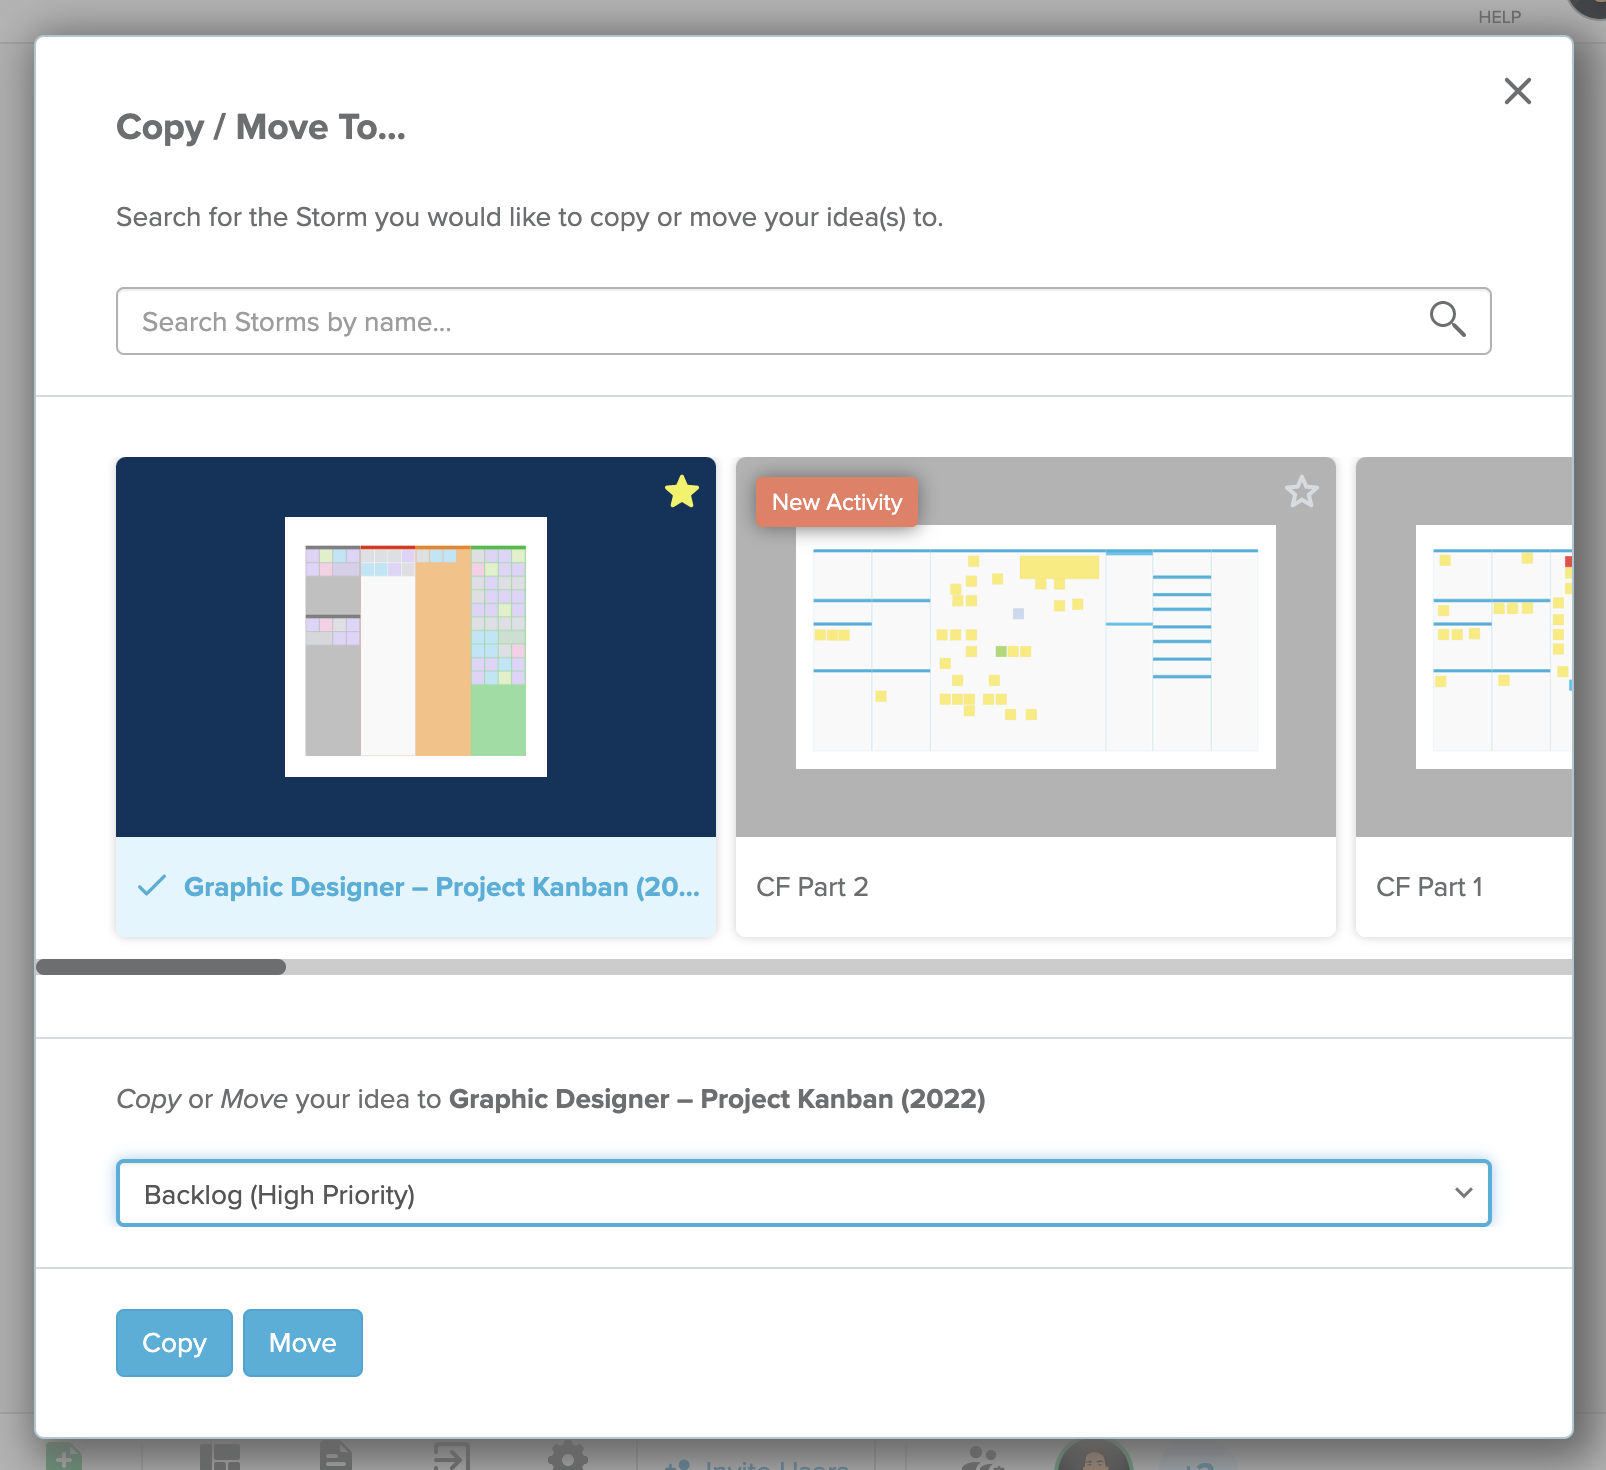
In the sticky note menu is an option to “Copy/Move To”. This allows you to copy or move the sticky note to another Storm.
When you click on this option, your other Storms appear in a new dialog box (shown below), where you can then select which Storm you want that sticky to go to, which section of the Storm to place it in, and whether you want to move the note or copy it.
Viewing the sticky note history
If you want to see the history of a sticky note (who created it, when it was created, what edits have been made, etc.), choose “Sticky History” from the sticky note menu. A dialog box will open showing exact dates, timestamps, and any changes made.
Voting on sticky notes
Voting makes it easy to quickly make decisions and get feedback from your team. You can vote on every type of sticky note, and you can even vote more than once on a single note.
Assigning a task to a sticky note
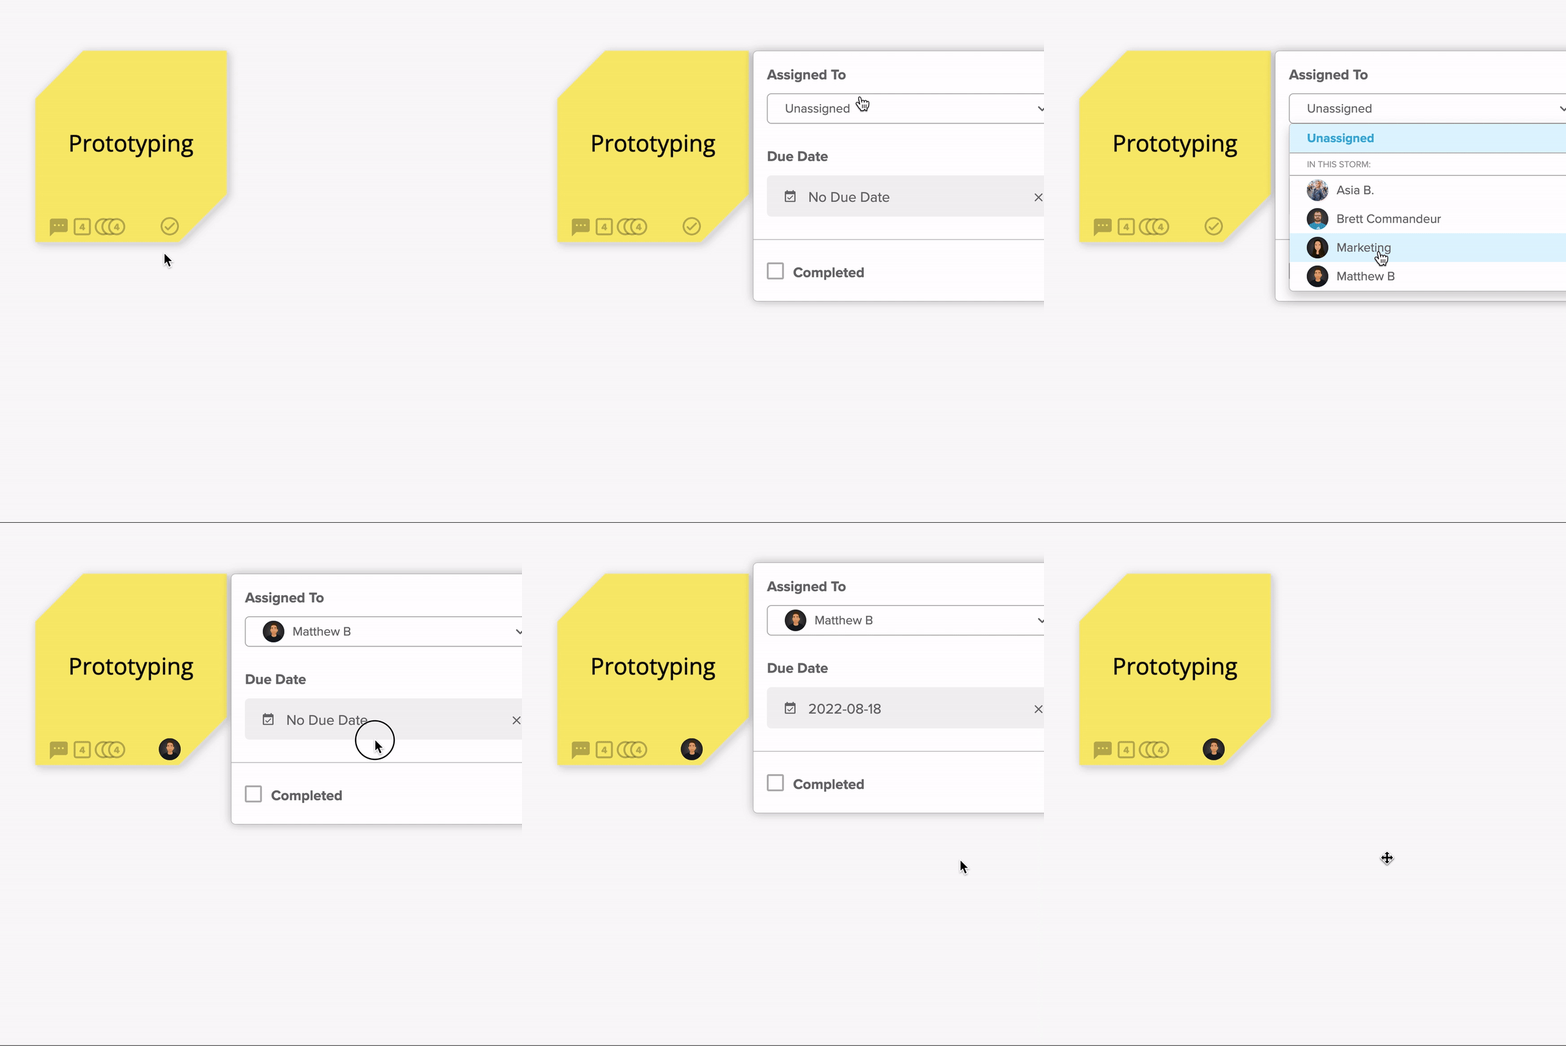
You can assign any sticky note or task to any member of your team.
To assign a note, click on the checkmark in the bottom right corner. Next, select the user you want to assign the note to and a due date. The user’s avatar will show up in the corner of the note, and they will be notified that they have been assigned a task.
Connecting sticky notes
Connect your content, and clearly view your workflow, using connector lines. These lines can go in different directions, can be color-coded, never break if you move your notes around, and more! (See the featured image at the top of this post for examples of connector lines).
Get Started!
If you and your team would like a demo to help you learn more about sticky notes, contact us! Are you interested in using Stormboard’s digital sticky notes during your meetings? Sign up for Stormboard now!


